MIDI Setup
MIDI is the protocol your pedals use to receive control messages. Nitelite sends MIDI from your browser to your pedal, so you need a way to get MIDI out of your computer.
What You Need
Section titled “What You Need”That depends on your pedal’s connection type — USB MIDI pedals plug straight in, 5-pin DIN pedals need a USB-MIDI interface, and Chase Bliss / classic Meris / Empress pedals need a manufacturer adapter box as well.
Choosing Your MIDI Hardware covers all four connection types, with specific recommendations by use case and budget.
Granting Browser Access
Section titled “Granting Browser Access”The first time you open Nitelite, your browser asks for permission to access MIDI devices. Click Allow.
If you accidentally clicked Block:
- Chrome / Edge: Go to
Settings → Privacy and security → Site settings → MIDI devicesand allow nitelite.ai. - Brave: Same path under
Brave Settings → Privacy and security.
Nitelite cannot send MIDI without this permission.
The MIDI Setup Panel
Section titled “The MIDI Setup Panel”Click MIDI in the left sidebar:
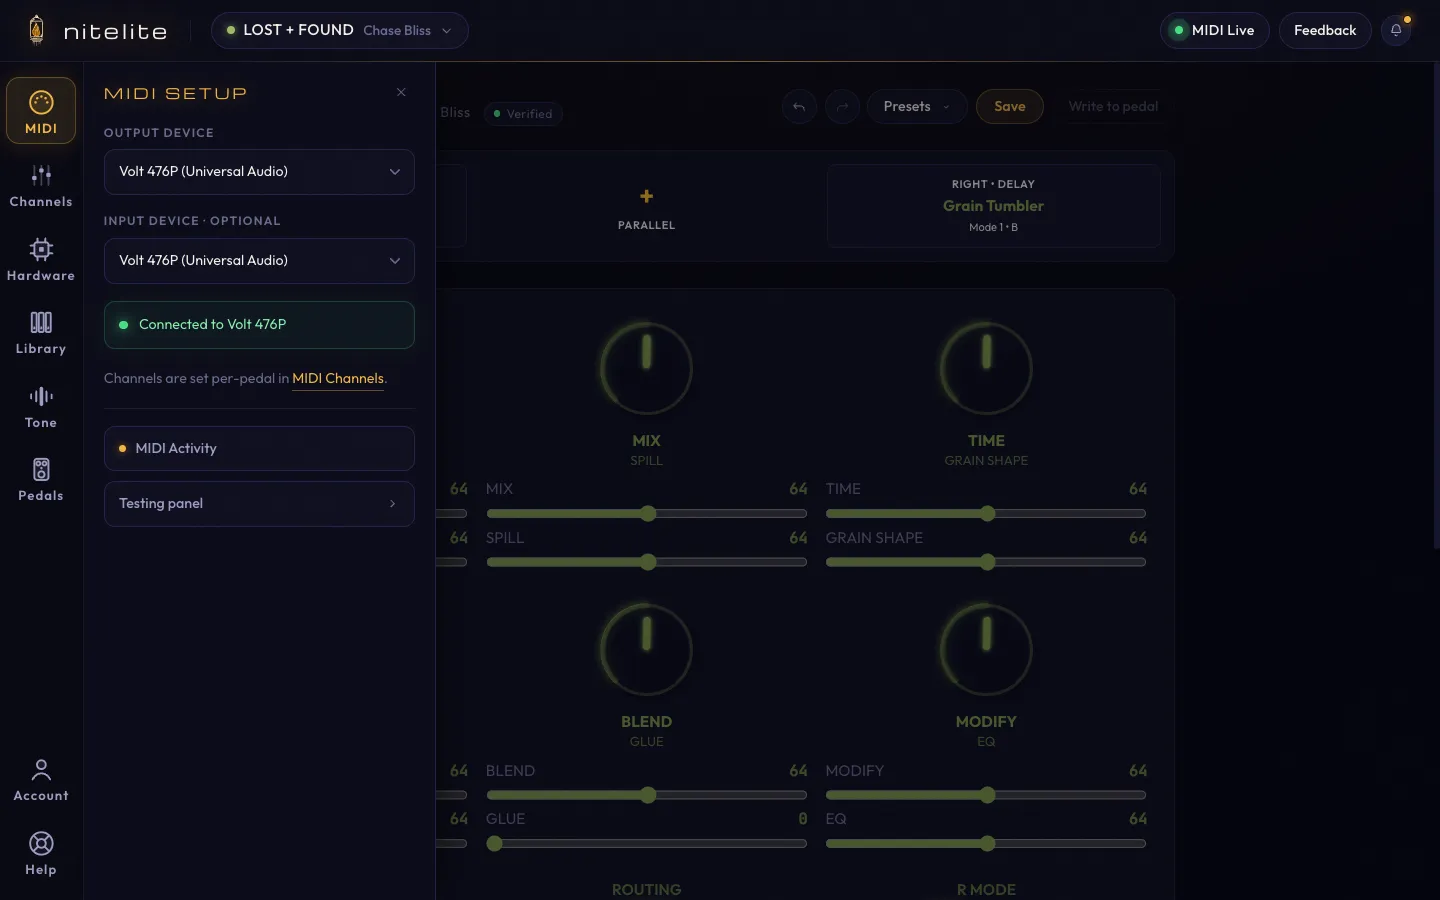
- Output Device — the device Nitelite sends MIDI through. This is the one that matters: select your USB-MIDI interface, or your pedal itself if it’s connected over USB. Nitelite auto-selects the first available device on startup.
- Input Device — optional; you can leave it alone for normal use.
- A green Connected banner confirms the link, and the header pill switches from MIDI Off to MIDI Live.
- MIDI Activity — a live monitor of outgoing messages, handy when debugging.
- Testing panel — send test messages manually to confirm the path to your pedal.
Not Working?
Section titled “Not Working?”The Troubleshooting page covers the common failure points: devices not appearing, pedals not responding, and channel mismatches.
See MIDI Channels to set up per-pedal channel assignments.